Protecting your roof from the high-velocity wind gusts common in coastal Hull and Scituate
If you live in Hull or Scituate, your roof faces some of the most punishing wind conditions in Massachusetts. The Atlantic Ocean delivers sustained gusts that can exceed 70 mph during Nor’easters, and those winds create powerful uplift forces that can tear shingles, lift flashing, and expose your home to water damage. Understanding how wind affects roofing materials and installation methods is the first step toward protecting your investment. Massachusetts State Building Code.
Wind uplift works by creating a pressure difference between the wind-facing side of your roof and the underside of the roof deck. As wind speeds increase, the pressure differential grows exponentially. At 70 mph, the uplift force on a typical roof can reach 20 pounds per square foot. That’s enough to lift properly installed shingles if they aren’t rated for those conditions or if the fastening pattern is inadequate.
The Massachusetts State Building Code requires that roofs in coastal A-zones like Hull and Scituate be designed to withstand specific wind loads. According to the 780 CMR, these areas must meet wind resistance standards that exceed inland requirements by 20 to 30 percent. This means using materials rated for higher wind speeds and ensuring proper installation techniques are followed.
Coastal wind damage often follows predictable patterns. The windward side of your roof experiences the highest stress, particularly at corners and edges where wind speeds increase due to the Venturi effect. Shingles in these areas are the first to fail, often starting with the sealant strips losing adhesion. Once one shingle fails, the wind gets underneath adjacent shingles, creating a cascading failure that can strip an entire roof section in minutes.
Understanding wind ratings and building codes for coastal Massachusetts
The Massachusetts State Building Code incorporates the International Building Code with local amendments that specifically address coastal wind conditions. For Hull and Scituate, the code requires roofs to be designed for wind speeds ranging from 110 to 130 mph, depending on the exact location and exposure category.
Building code section 1609.1.1 of the 780 CMR specifies that all roofing systems in coastal high-velocity zones must meet ASTM D3161 Class F standards. This test subjects roofing materials to wind tunnel conditions simulating 110 mph winds for two hours. Materials that pass this test receive a Class F rating, indicating they can withstand the most severe wind conditions. Why Metal Roofing is Becoming a Top Choice for Coastal East Boston Homes.
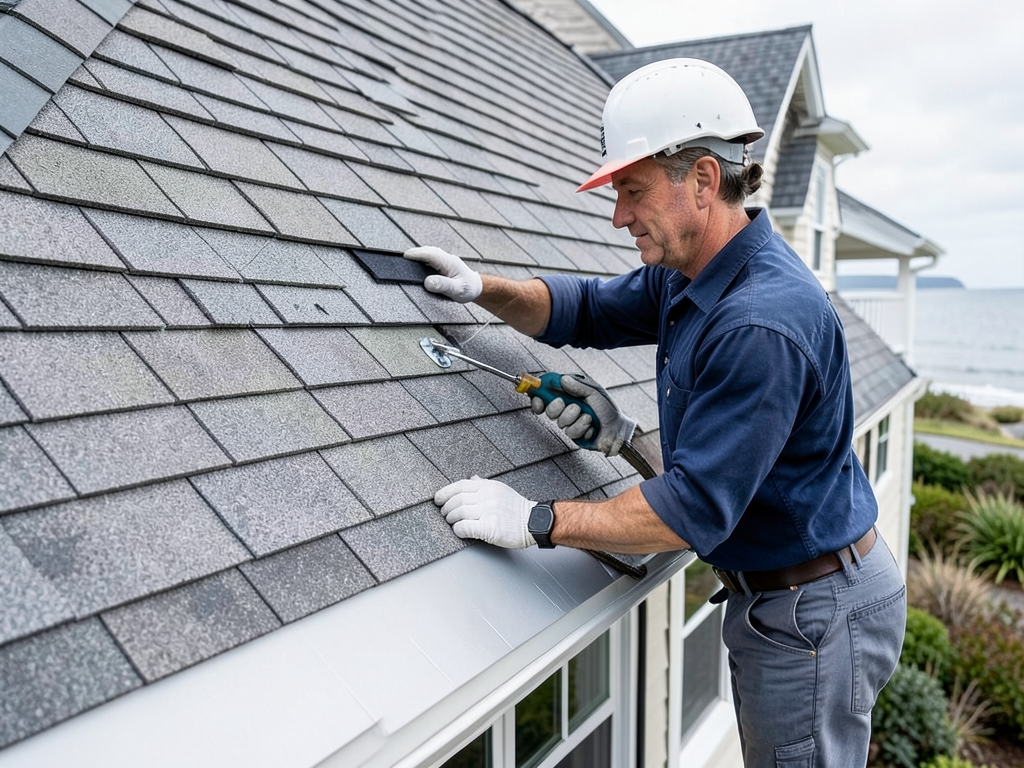
Beyond material ratings, the code mandates specific installation requirements. Section 1504.1.5 requires that asphalt shingles in coastal zones use a six-nail fastening pattern instead of the standard four-nail pattern. Each nail must be placed at least 1 inch from the edge of the shingle and driven flush with the surface. The nails themselves must be corrosion-resistant, typically hot-dipped galvanized or stainless steel, to withstand the salt air exposure common in coastal areas.
The code also requires enhanced underlayment in coastal zones. Section 1507.2.8 mandates that all roof decks in wind-prone areas receive a secondary water barrier. This typically means installing a self-adhering polymer-modified bitumen membrane along the eaves, valleys, and around all roof penetrations. This membrane seals around fasteners and creates a watertight barrier even if the primary roofing material fails. The Best Roofing Strategies for Multi-Family Property Owners in Savin Hill.
Best materials for high-wind resistance in coastal environments
Not all roofing materials perform equally in high-wind conditions. The right choice depends on your home’s architecture, your budget, and the specific wind challenges of your location in Hull or Scituate. Roofing Quincy.
Asphalt architectural shingles represent the most common choice for coastal homes. Look for shingles with a minimum 130 mph wind rating. These typically feature a thicker mat base, enhanced sealant strips, and a more aggressive nailing pattern. GAF’s Timberline HDZ and CertainTeed’s Landmark Pro both offer 130 mph rated options that meet coastal Massachusetts requirements.
Metal roofing provides superior wind resistance compared to asphalt. Standing seam metal panels lock together and are attached directly to the roof deck with concealed fasteners. This creates a monolithic surface that wind cannot penetrate. When properly installed with the correct clip spacing, metal roofs can withstand winds exceeding 140 mph. The smooth surface also sheds snow more effectively, reducing the risk of ice dam formation that often accompanies coastal storms.
Slate and synthetic slate offer exceptional durability in coastal environments. Natural slate tiles, when properly installed on a reinforced deck, can last 75 to 100 years. Their weight and overlapping installation pattern make them naturally resistant to wind uplift. Synthetic slate, made from polymer composites, provides similar wind resistance at a lower weight and cost. Both materials perform well in salt air environments because they don’t corrode like metal fasteners might. Bringing Natural Light into Your South End Attic with Custom Skylights.
The following table compares common roofing materials for coastal wind resistance:
| Material Type | Wind Rating (mph) | Lifespan (years) | Cost per sq ft | Best For |
|---|---|---|---|---|
| Asphalt Architectural | 130 | 25-30 | $4.50-$6.50 | Most homes, budget-conscious |
| Standing Seam Metal | 140+ | 40-60 | $8.00-$12.00 | Contemporary homes, snow shedding |
| Natural Slate | 110+ | 75-100 | $15.00-$25.00 | Historic homes, premium installations |
| Synthetic Slate | 130 | 40-50 | $8.00-$11.00 | Traditional look, lighter weight |
Installation techniques that maximize wind resistance
Even the best materials fail if installed incorrectly. High-wind installation requires specific techniques that go beyond standard roofing practices.
The starter strip is critical for wind resistance but often overlooked. This first row of shingles along the eaves creates a sealed edge that prevents wind from getting underneath the main roof surface. In coastal zones, starter strips should extend at least 1/4 inch beyond the drip edge and feature enhanced sealant strips on both the top and bottom surfaces. This creates a double-sealed edge that resists uplift from both directions.
Nail placement and pattern make the difference between a roof that survives a storm and one that fails. In coastal Massachusetts, the six-nail pattern is mandatory, but the placement matters just as much as the number. Nails should form a rectangle with two nails in the top half of the shingle and four in the bottom half. This distribution resists both uplift and shear forces. Each nail must penetrate through the roof deck or at least 3/4 inch into wood plank decks.
The nailing zone within each shingle is also critical. Modern architectural shingles feature a double-layer nailing zone where the underlying shingle provides additional holding power. Always nail in this reinforced area, never above or below it. Nailing above the zone reduces holding power by 30 percent, while nailing below can cause the shingle to tear out during high winds.
Underlayment choices significantly impact wind performance. Traditional felt paper can tear in high winds, exposing the deck. Synthetic underlayments offer superior tear resistance and can remain exposed for months during construction. For coastal installations, consider using a high-temperature synthetic underlayment with a slip-resistant surface. This provides better footing for installers and maintains integrity if shingles are lost during a storm.
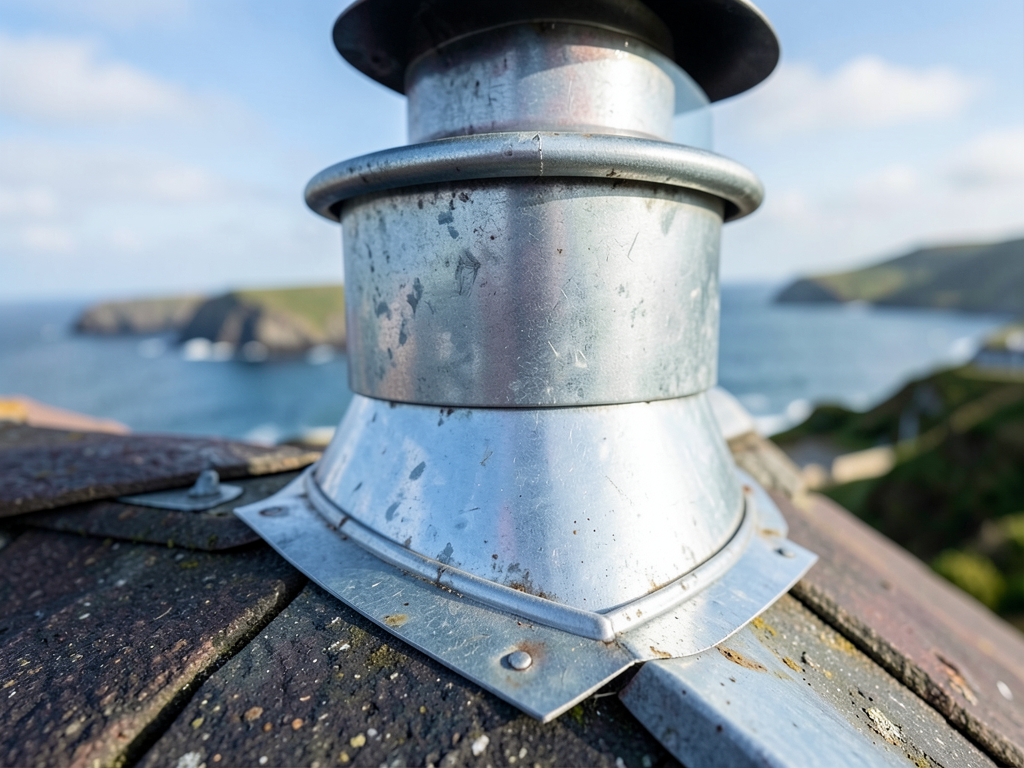
Flashing details often determine whether a roof survives or fails in extreme winds. All flashing should be secured with at least two fasteners per piece, and step flashing should be interwoven with each course of shingles. The counter-flashing should extend at least 4 inches into the mortar joint on brick chimneys and be sealed with a high-quality polyurethane sealant that remains flexible in cold temperatures.
Common failure points and how to prevent them
Understanding where roofs typically fail in high winds helps you prevent those failures. Most wind damage follows predictable patterns based on roof geometry and installation quality.
Edge failure is the most common problem. Wind accelerates as it moves up the roof surface, reaching maximum velocity at the edges. If the starter strip or first course of shingles isn’t properly sealed, wind can get underneath and peel back entire sections. Always inspect the roof edge after storms for signs of lifting or sealant failure.
Valley areas concentrate wind forces and often experience the highest uplift pressures. Open valleys with metal lining are more resistant to wind damage than closed-cut valleys where shingles overlap. If your roof has valleys, ensure they’re flashed with at least 24-gauge galvanized steel and extend the underlayment into the valley at least 18 inches on each side.
Roof penetrations create natural weak points. Vent pipes, chimneys, and skylights interrupt the continuous surface of the roof, creating edges where wind can catch. All penetrations should be flashed with both step flashing and counter-flashing, and the area around the penetration should receive extra sealant. For coastal homes, consider using lead or copper flashing instead of galvanized metal, as these materials resist salt corrosion better.
Shingle blow-off often starts with sealant failure. Modern shingles use asphalt sealant strips that activate in heat. In coastal areas, temperature fluctuations can cause these sealants to become brittle and lose adhesion. Inspect your roof annually for shingles that appear lifted or have visible gaps at the sealant strips. These are candidates for repair before they fail completely.
The following steps outline a wind damage prevention inspection you can perform:
- Examine Roof Edges
Check the perimeter for lifted shingles, exposed nails, or deteriorated sealant. Pay special attention to corners where wind forces concentrate.
- Inspect Flashing Details
Look for loose or missing flashing around chimneys, vents, and skylights. Ensure all fasteners are present and sealant is intact.
- Test Shingle Adhesion
Gently lift the corners of several shingles to check if the sealant strip is still bonded. Replace any that lift easily.
- Check Fastener Exposure
Look for exposed nail heads, especially on ridge caps and hip shingles. Exposed fasteners allow water intrusion and reduce wind resistance.
- Examine Underlayment at Eaves
Check that the ice and water shield extends at least 24 inches past the interior wall line, as required by Massachusetts code.
Insurance considerations for coastal wind damage
Insurance companies recognize that coastal homes face higher wind risks, and they often offer premium discounts for wind mitigation features. Understanding these requirements can save you money and improve your home’s protection.
The Insurance Institute for Business & Home Safety (IBHS) has developed a Fortified Home certification program that includes specific wind resistance standards. Homes that meet these standards may qualify for insurance discounts of 20 to 30 percent in coastal areas. The program requires enhanced fastening, improved underlayment, and impact-resistant roofing materials. IBHS Fortified Home program.
Massachusetts insurance companies often require a wind mitigation inspection before issuing or renewing policies for coastal homes. This inspection evaluates your roof’s age, material, installation quality, and compliance with current building codes. Homes with Class 4 impact-resistant shingles and enhanced fastening patterns typically receive the best rates.
Documenting your roof’s wind-resistant features can simplify insurance claims if damage occurs. Keep records of material specifications, installation dates, and any wind mitigation improvements. Photos showing the six-nail pattern, enhanced underlayment, and proper flashing details provide evidence of your roof’s wind resistance rating.
Many coastal homeowners don’t realize that standard homeowners insurance policies exclude wind damage in high-risk areas. You may need a separate windstorm insurance policy or a policy endorsement that specifically covers wind damage. These policies often have higher deductibles but provide crucial protection for coastal properties.
When filing a wind damage claim, document everything immediately after the storm. Take photos of the damage before making temporary repairs, and keep all receipts for emergency repairs. Most insurance policies require you to mitigate further damage, so temporary tarping is usually covered if done promptly.
Maintenance schedule for maximum wind resistance
Regular maintenance extends your roof’s life and maintains its wind resistance. Coastal environments accelerate wear due to salt air, temperature fluctuations, and frequent storms.
Spring maintenance should focus on winter damage assessment. Check for lifted shingles, damaged flashing, and clogged gutters that can cause ice dam formation. Clean all debris from roof surfaces and gutters, as accumulated leaves and branches create points where water can back up under shingles. The Best Way to Keep Gutters Clog-Free in Wooded West Roxbury Neighborhoods.
Summer is the time to address sealant failures. The heat activates asphalt sealants, making it the ideal time to re-seal lifted shingles. Check all pipe boots, vent flanges, and skylight seals for cracks or shrinkage. Replace any boot that shows signs of UV damage.
Fall maintenance prepares your roof for winter storms. Ensure all fasteners are tight and replace any missing or corroded nails. Check that all valley flashing is secure and that the ice and water shield at eaves is intact. Consider having a professional inspection before the nor’easter season begins.
Winter requires vigilance during and after storms. After each major storm, inspect your roof from the ground with binoculars. Look for missing shingles, damaged flashing, or ice dam formation. If you notice ice dams, address the underlying ventilation issues rather than just removing the ice.
The following maintenance schedule helps maintain maximum wind resistance:
- Annual Professional Inspection – Have a qualified roofer inspect your roof each spring to identify potential problems before they cause damage.
- Bi-Annual Sealant Check – Examine all sealant joints in spring and fall, re-sealing any that show signs of cracking or separation.
- Post-Storm Assessment – After any storm with winds over 50 mph, inspect your roof for damage and make immediate repairs to prevent further problems.
- Gutter Maintenance – Clean gutters quarterly to prevent water backup that can damage the roof edge and compromise wind resistance.
- Fastener Inspection – Check all visible fasteners annually and replace any that are corroded or missing.
Cost considerations and return on investment
High-wind roofing solutions require higher upfront investment but often provide better long-term value through reduced maintenance and insurance costs.
The cost difference between standard and wind-resistant roofing materials varies significantly. Standard architectural shingles cost $3.50 to $4.50 per square foot installed, while 130 mph rated shingles cost $4.50 to $6.50 per square foot. The premium is typically 20 to 30 percent but includes better materials and often comes with longer warranties.
Metal roofing costs more upfront at $8.00 to $12.00 per square foot but can last 40 to 60 years with minimal maintenance. When you factor in the elimination of replacement costs every 20 to 30 years, the lifetime cost often equals or beats asphalt shingles. Metal also provides energy savings through better reflectivity and can increase your home’s resale value.
Insurance premium reductions can offset the higher initial cost. Many Massachusetts insurers offer 10 to 20 percent discounts for wind mitigation features. On a $2,000 annual premium, this saves $200 to $400 per year. Over a 20-year roof life, these savings can cover the premium for wind-resistant materials.
Maintenance costs also factor into the total investment. Wind-resistant roofs typically require less frequent repairs and have fewer emergency callouts after storms. A standard roof might need $500 to $1,000 in repairs every 5 years, while a properly installed wind-resistant roof might go 10 to 15 years between significant maintenance events.
Consider the cost of not upgrading. A single major wind event can cause $5,000 to $15,000 in damage to a standard roof, including water damage to interior finishes. The deductible on your insurance policy is typically $1,000 to $2,500, meaning you pay that amount regardless of the total damage. Wind-resistant materials often prevent this type of catastrophic failure.
The following table shows typical costs and savings for different roofing approaches:
| Roofing Option | Initial Cost (1,000 sq ft) | Annual Maintenance | Insurance Savings/Year | Lifetime (30 yrs) Cost |
|---|---|---|---|---|
| Standard Asphalt | $4,500 | $300 | $0 | $13,500 |
| Wind-Rated Asphalt | $5,500 | $200 | $250 | $11,500 |
| Standing Seam Metal | $10,000 | $100 | $400 | $13,000 |
Choosing the right contractor for coastal wind roofing
Not all roofing contractors have experience with coastal wind requirements. Choosing the right contractor ensures your roof meets code requirements and provides maximum protection.
Look for contractors with specific coastal experience. Ask how many roofs they’ve installed in Hull, Scituate, or other coastal communities in the past year. Experience with coastal conditions means understanding salt air corrosion, high wind fastening patterns, and the specific requirements of the 780 CMR for coastal zones.
Verify manufacturer certifications. GAF Master Elite and CertainTeed Select ShingleMaster certifications require ongoing training and adherence to installation best practices. These contractors have access to extended warranties and are more likely to follow the specific requirements for wind-rated installations.
Ask about their inspection process. A quality contractor will inspect your roof deck for rot or damage before installation, ensure proper ventilation to prevent ice dams, and verify that all flashing details meet wind resistance standards. They should provide a detailed written proposal that specifies materials, fastening patterns, and warranty coverage.
Check references specifically for wind performance. Ask past customers about their experience during recent storms. Did the roof perform as expected? Were there any wind-related issues? This real-world performance data is more valuable than generic references.
Ensure the contractor pulls all required permits. Coastal roofing often requires additional inspections beyond standard roofing permits. The permit process ensures the installation meets current code requirements for your specific location and exposure category.
Finally, verify insurance coverage. Coastal roofing involves working in high-wind conditions and often requires cranes or lifts for material handling. Ensure your contractor carries both liability and workers’ compensation insurance, and verify that their coverage is current.
Frequently Asked Questions
How much wind can my roof withstand?
Most standard roofs are rated for 60-80 mph winds, but coastal Massachusetts requires 110-130 mph ratings. Wind-rated shingles and proper installation can increase this to 140+ mph. The actual performance depends on material quality, installation technique, and maintenance.
What’s the difference between wind-rated and standard shingles?
Wind-rated shingles feature thicker mats, enhanced sealant strips, and more aggressive nailing patterns. They undergo testing to simulate 110+ mph winds for extended periods. Standard shingles lack this testing and typically fail at lower wind speeds.
How often should I inspect my coastal roof?
Coastal roofs should be inspected annually by a professional and after any storm with winds over 50 mph. DIY inspections every three months can identify developing problems before they cause damage.
Can I upgrade my existing roof for better wind resistance?
Yes, you can add wind-resistant features to existing roofs. Options include adding enhanced underlayment, re-sealing shingles, upgrading flashing, and installing hurricane straps. However, if your roof is over 15 years old, replacement often makes more economic sense.
What building code applies to my coastal roof?
The Massachusetts State Building Code (780 CMR) applies to all roofs in Massachusetts. Coastal areas have additional requirements in section 1609.1.1 for wind loads and section 1504.1.5 for fastening patterns. Your local building department can provide specific requirements for your address.
Protecting your home from coastal wind damage requires understanding the specific challenges of your location, choosing appropriate materials, and ensuring proper installation. The investment in wind-resistant roofing pays dividends through reduced maintenance, lower insurance costs, and peace of mind during storm season.
Don’t wait for the next Nor’easter to test your roof’s wind resistance. Call (857) 387-1711 today to schedule a professional inspection and learn which wind-resistant options best suit your Hull or Scituate home. Our team understands coastal building codes and can recommend solutions that protect your investment for decades to come.
You may also find this helpful. The hidden cost of ignoring minor flashing issues on a Quincy waterfront home.